
Interacting with custom libraries in Google Colaboratory
Introduction
Colaboratory, also known as Colab, is a great tool created by Google for individuals interested in hands-on experience with the recent AI development. It offers a free CPU/GPU quota and a preconfigured virtual machine instance set up for to run Tensorflow and Keras libraries using a Jupyter notebook instance. In one sentence, it is a perfect “getting started” point for experimentation with neural networks for any part-time hobbist or computer nerd.
However, unlike standalone Jupyter, its preconfigured settings are targetted to focus on experimentation, and to lesser extent software development.
This intention somehow breaks the development routine(s) for many software developers including myself.
Although it allows certiain unix commands to be executed (using ! mark), essentially all interactions with the virtual machine happens though the notebook itself.
As, at least for the time being, there seems to be no possibility to access the backend using e.g. SSH, working across multiple python files and libraries become a bit cumbersome.
In the end, this setup leaves the user with having to force all code into the notebook’s cells.
This post is my best attempt to work around at least some to the difficulties, and so here I would like to share of what I managed to come up with so far.
(My) usual pattern
First of all, I would not like to blind side this post into a discussion around things such as “my favourite text editor or IDE”, as people tend to have their opinion on this topic. My perference goes to the linux command line interface and vim/tmux, but yours can be different. The point is that irrespectively of the IDE the general pattern when working with python projects tends to boil down to the following things:
- Create a project directory (let’s call it project’s root).
- Initialize or cloning of a git repository within that directory.
- Set up a virtual environment, activating it and installing relevant packages.
- Work across mutliple files to solve the problem in a logical and structured way.
- While working, revision changes through git and finally open a pull request once certain feature is ready.
With Google Colab, the primary focus goes on playing around with the models.
Therefore, the first and the third point are resolved automatically when you first generate or open the notebook.
(In case you need additional installations, !pip install <package> or !apt-get install <package> would do the job.)
Point number 2. is somewhat solved.
You can use GUI to import or save the notebook itself using GitHub.
You may also use !git clone <your-repo> command to load the stuff from public repositores.
Unfortunately, points 4. and 5. are not quite supported. If you want to modify or revision other files… well… it becomes a challenge.
Workaround
Here, I have to make it clear that my workaround is only partial. I have not figured it out how I can push the code to Gihub directly from the Colab notebook (apart from the notebook itelf, of course). However, with these simple steps, I managed to make my workflow somewhat more comfortable. Here it goes:
Creating space in Google Drive
First, I keep my work organized in a sub-directory within Google Drive. It is not the “root” directory of the project, but there I can store all python files I can edit. Aslo mounting of a Google Drive is very easy in Colaboratory. All you need to do is to execute the following lines:
1
2
3
4
5
from os.path import join
from google.colab import drive

ROOT = "/content/drive"
drive.mount(ROOT)
Once you are prompted for token and authentication, you obtain access to all your files within the Drive.
Fetiching git repository
If you choose to start a new project, you can initialize an empty git repository using:
1
2
3
4
PROJ = "My Drive/Colab Experimental/Workspace" # This is a custom path.
PROJECT_PATH = join(ROOT, PROJ)
!mkdir "{PROJECT_PATH}"
!git init "{PROJECT_PATH}"
or fetch the already existing repository using:
1
2
3
4
5
6
GIT_USERNAME = "OlegZero13"
GIT_TOKEN = "xxxxxxxxxxxxxxxxxxxxxxxxxxxxxxxxx"
GIT_REPOSITORY = "SomeRepo"

!mkdir "{PROJECT_PATH}"
!git clone https://{GIT_TOKEN}@github.com/{GIT_USERNAME}/{GIT_REPOSITORY}.git "{PROJECT_PATH}"
The lines above assume that you have generated token in Github, which will allow you to bypass being asked for the password. That is an assumption that your repository is not public. Otherwise, you will not be asked for the password. However, in case you would prefer to work with a private repository, you will need to authenticate for GitHub and then, defining an access token for a particular repository is definitely a safer option than writing the password explicitly.
All in all, this way you will dump the entire project into the Drive.
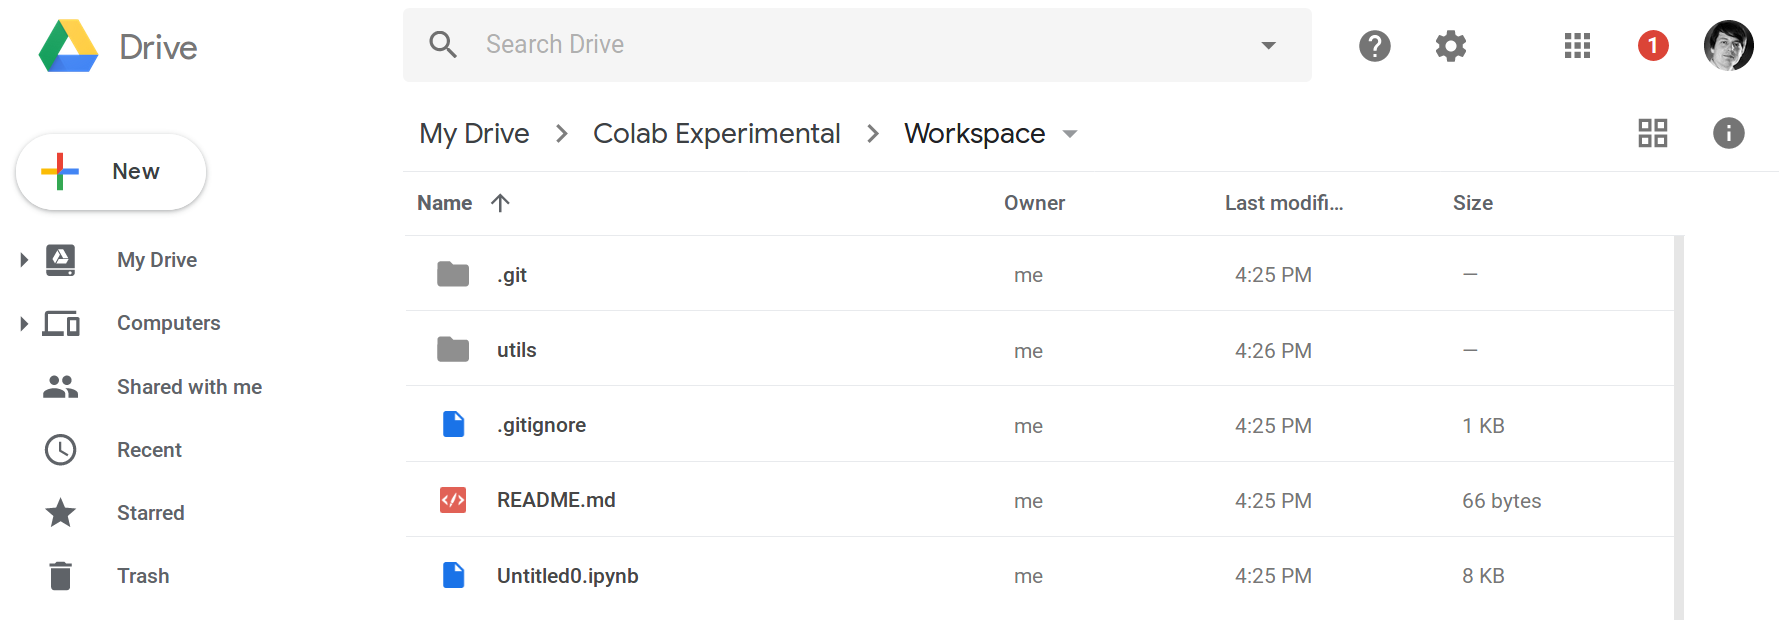
Editing
The final part is to include the project packages into your Colab workspace.
This is the fun part.
In case you are happy with simply importing content from other python files without editing, you could just as well have cloned the git repository directly to the workspace in Colab (same command without "{PROJECT_PATH}" at the very end).
In many cases, however, you would like to retain freedom to edit or modify your custom libraries. Now, that the files are kept in Google Drive, you can use any text editor such as Anyfile or Drive Notepad. My recommendation? Python Compiler Editor, since it can also execute code.

Importing
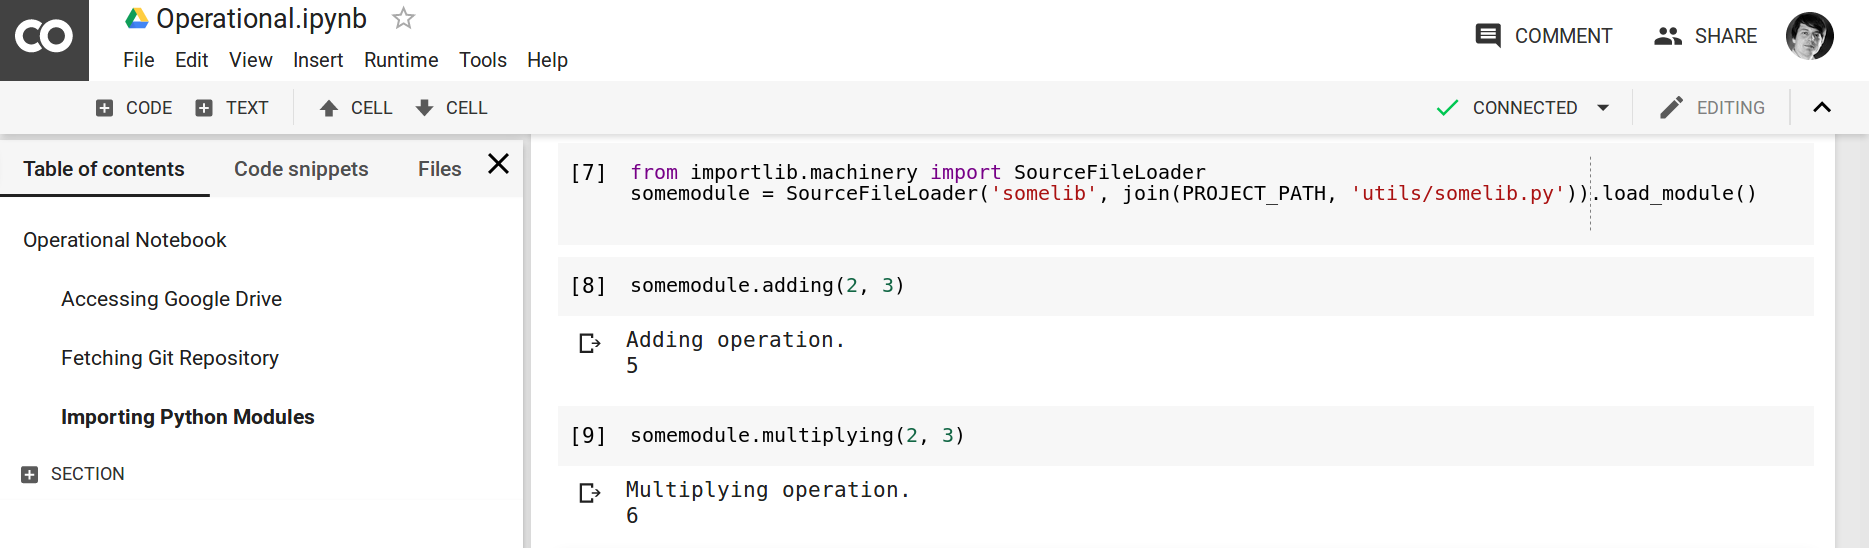
Since our libraries exist under Google Drive, simple imports will fail as they will not be able to locate the files correctly.
Fortunately, the relative paths to the modules can be tweaked using python native importlib library with very simple commands.
Again, execute in Colab:
1
2
from importlib.machinery import SourceFileLoader
somemodule = SourceFileLoader('somelib', join(PROJECT_PATH, 'utils/somelib.py')).load_module()
This will give you the access to all the definitions created under ./utils/somelib.py file - your custom library.
Invoking the functions works like this:
Finally, whenever you edit any of the imported files, you must remember to re-execute the cells where you do the importing. This way, however, you will be able to focus on your main “experimentation thread”, meaning the notebook, but define your own support functions and classes in separate files. Pretty much just how you would do when working on a “normal” project.
Closing Remarks
In this post, we have shown how we can take advantage of Google Drive and relative imports to make the Colaboratory workflow more convenient. The post showed how to mount the drive and perfom the imports in a way, where we can distibute the code among several files. Revisioning of the entire project or workspace through git is, unfortunately, still and open question, hence I would greatly appreciate your input in comments!
Update
We simplified the workflow, including saving the workspace in Github. Check out newer post.
Also, take a look at my recent post on how to run Jupyter Lab (or any other service) on Colab using an SSH tunnel.